
Back To School Themed Snack Board
The school season is here, and what better way to kick things off than with a Back to School Themed Snack Board! Creating a school-themed snack board is one of those great things you can turn into a fun little tradition each start of the school year. Whether you’re hosting a back to school party or just want a special treat for your kids after the first day of school, this board is packed with adorable and tasty options.
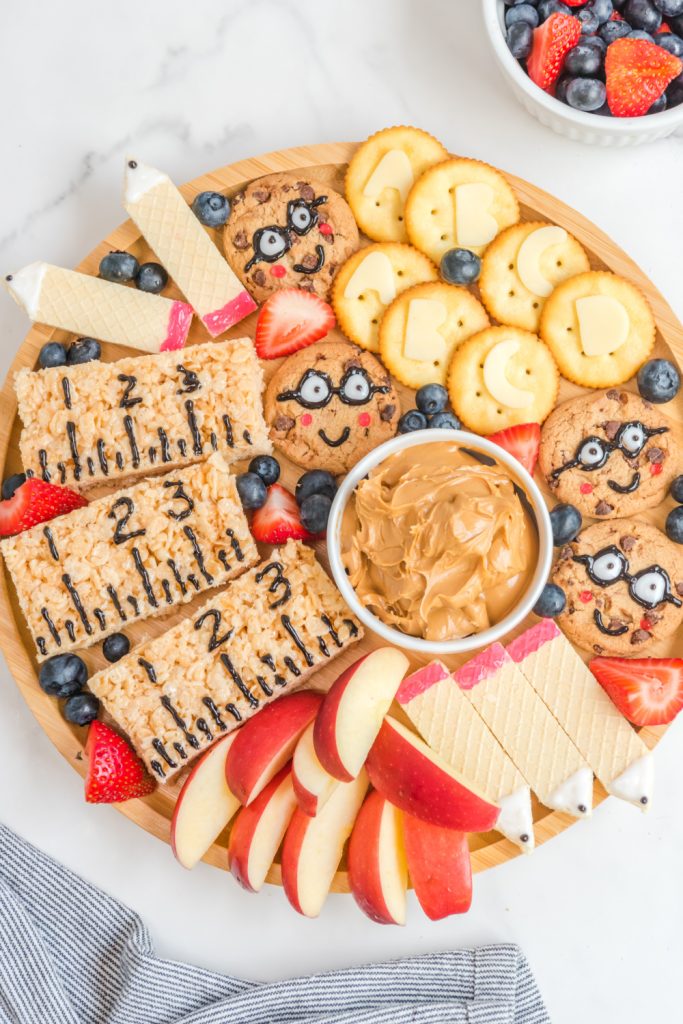
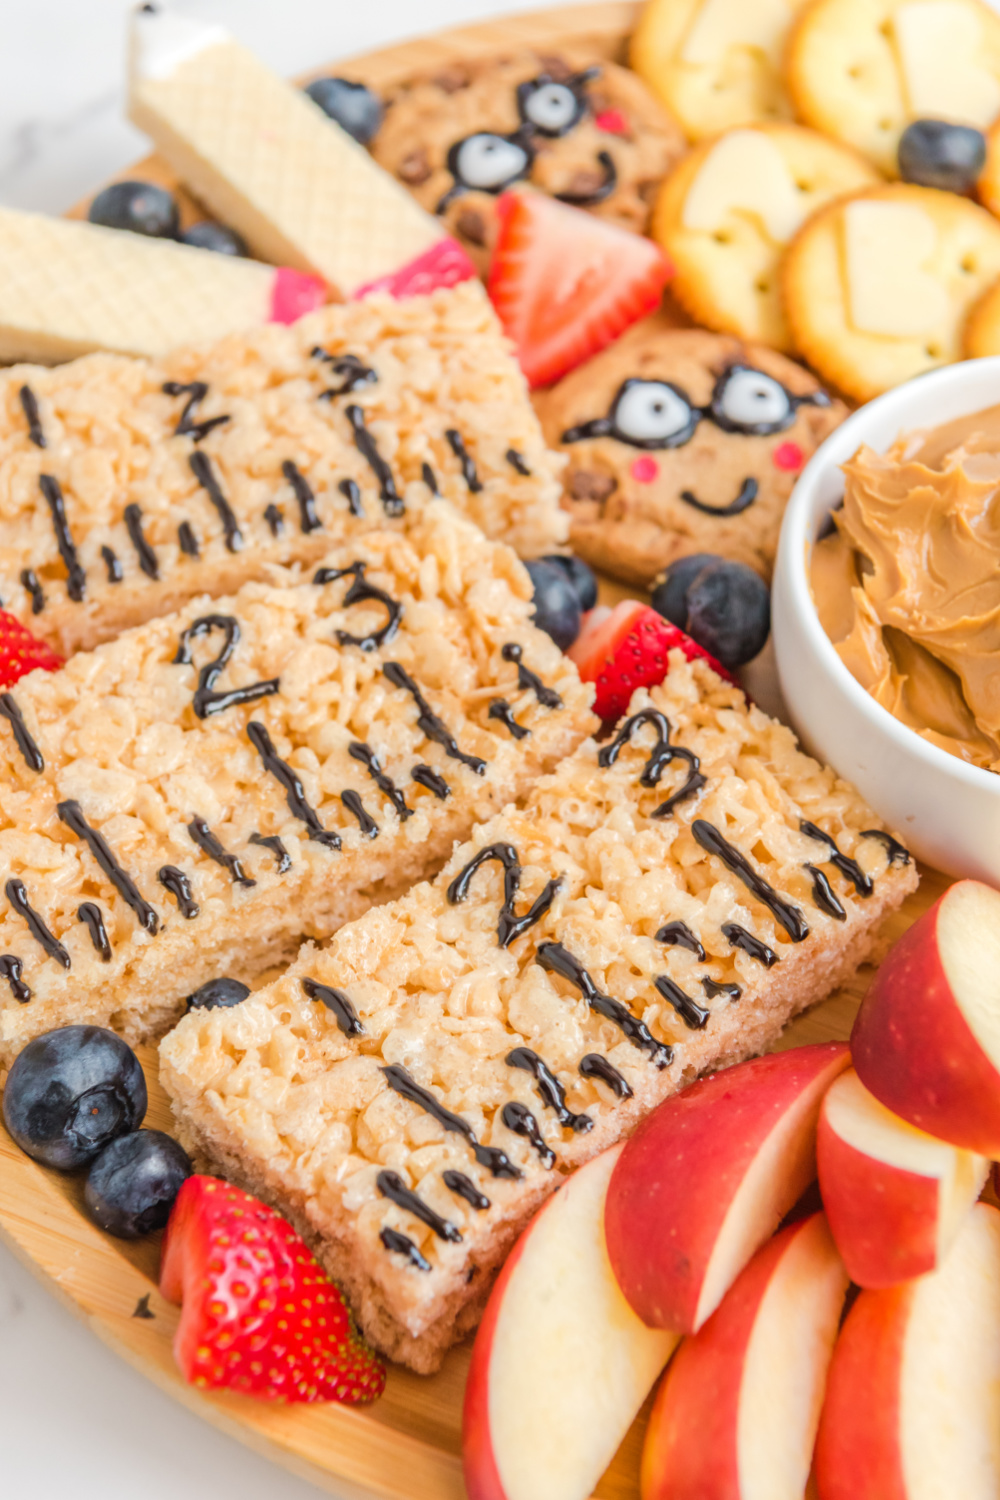
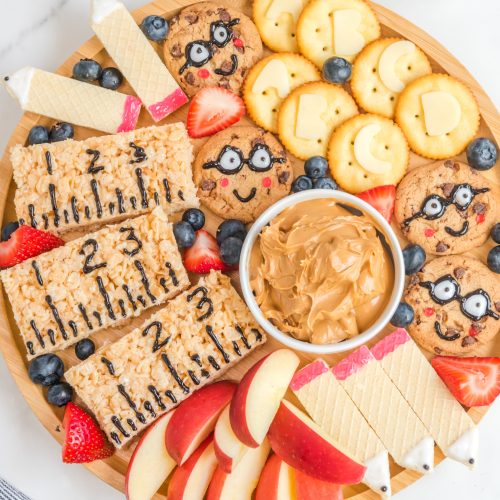
From vanilla wafer pencils to rice crispy rulers, it’s a playful mix of healthy snacks, sweet treats, and fun finger foods. Grab some small bowls, cookie cutters, and your favorite foods for this fun activity the whole family will enjoy!
🎯 Helpful Tips
- Use a 12” round board like this one on Amazon for a balanced layout.
- Break up the same snack into smaller groups across the board for a visually appealing design.
- Fruits are great for filling gaps—think mandarin orange segments, cherry tomatoes, or orange carrots.
- Decorate cookies slowly with small gel dots for the best results.
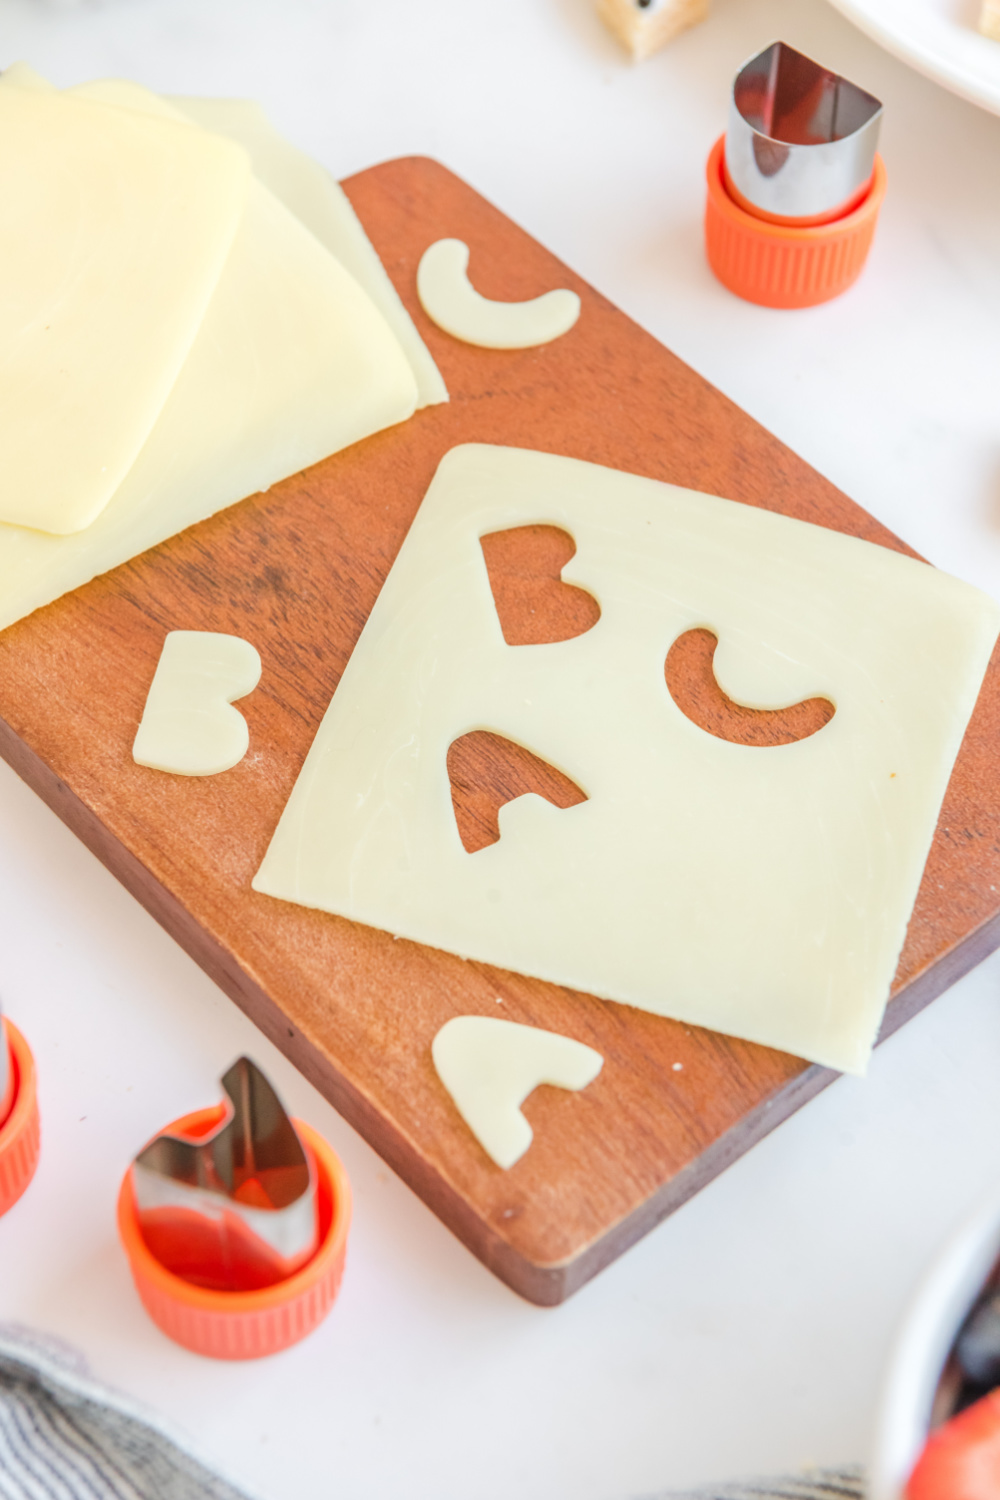
- These letter cutters are perfect for the cheese.
Email Me This Recipe!
Need to save time? Have this article emailed straight to your inbox + sign up for all the latest recipes!
Yes! You can prep the rulers, smiley cookies, and wafer pencils the night before. Add the fruit and crunchy items right before serving to keep everything fresh.
You can use edible food markers or small piping bags with tinted frosting as an alternative.
Peanut Butter → Use sunflower butter or Greek yogurt dip for allergy-friendly snack time.
Ritz Crackers → Swap with whole grain crackers or rice cakes for a healthier twist.
Chips Ahoy → Try alphabet graham crackers for an extra school-themed touch.
Mozzarella Cheese Slices → Use cheddar, colby jack, or adorable Babybel cheeses in different colors.
Mixed Fruit → Any fresh fruits will work—just choose a variety of colors for a rainbow board.
Ingredient Notes
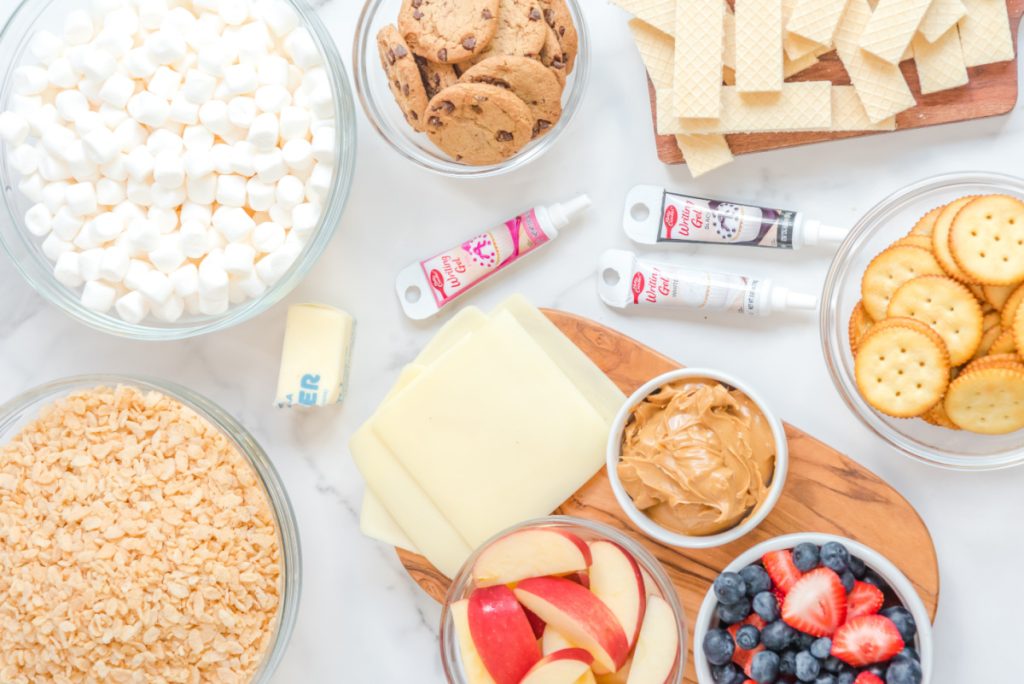
- Butter – Helps melt the marshmallows and bind the rice crispy cereal for your ruler base.
- Mini Marshmallows – Melted into gooey goodness to hold the rice crispy treats together.
- Rice Crispy Cereal – The base of the edible rulers and a favorite school snack idea.
- Black, White & Pink Writing Gel – Used to decorate rulers, pencils, and smiley faces with school-themed designs.
- Chips Ahoy Cookies – The perfect base for cute smiley face cookie “students.”
- Vanilla Wafers – Transformed into pencil-shaped treats with just a few simple cuts and gel.
- Mozzarella Cheese Slices – Use cookie cutters to create alphabet letters for a school charcuterie board look.
- Ritz Crackers – Great addition for balance and crunch; pairs well with cheese cubes.
- Apple Slices – A classic school lunch idea; serve with peanut butter or sunflower butter.
- Peanut Butter Dipping Cup – A fun way to dip fruits or crackers—swap for sunflower butter if nut-free.
- Mixed Fruit – Adds color, freshness, and healthy foods to your kid’s board.
How to Make A Back To School Themed Snack Board
Rice Crispy Ruler Instructions:
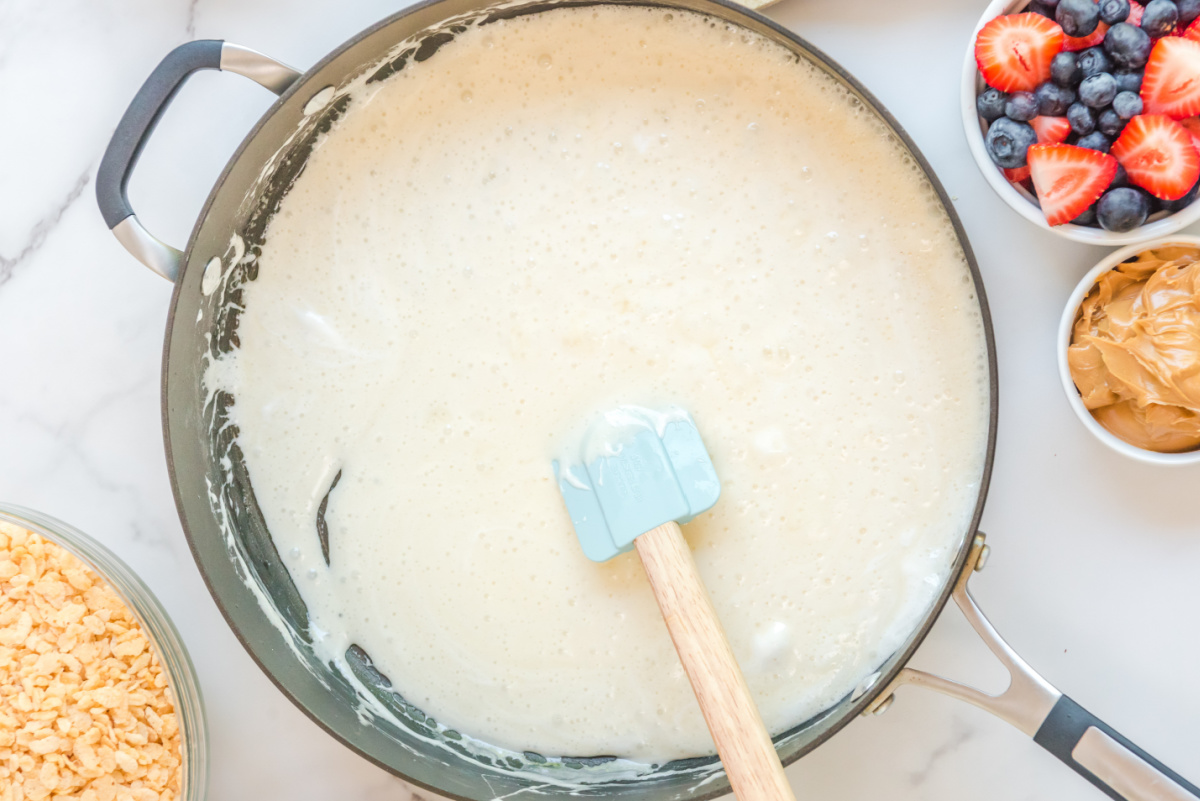
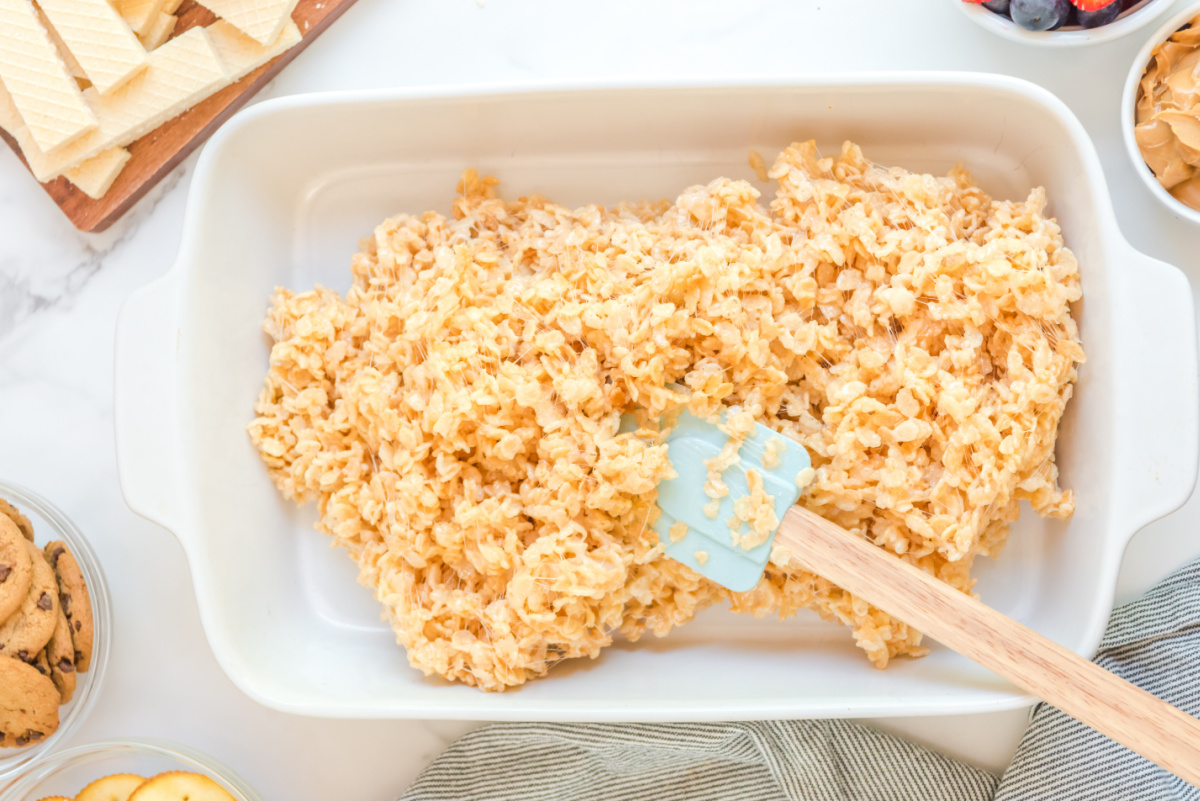
- Place butter over low-medium heat until fully melted. Add the bag of mini marshmallows to the melted butter and stir using a ruber spatula until the marshmallows completely dissolve.

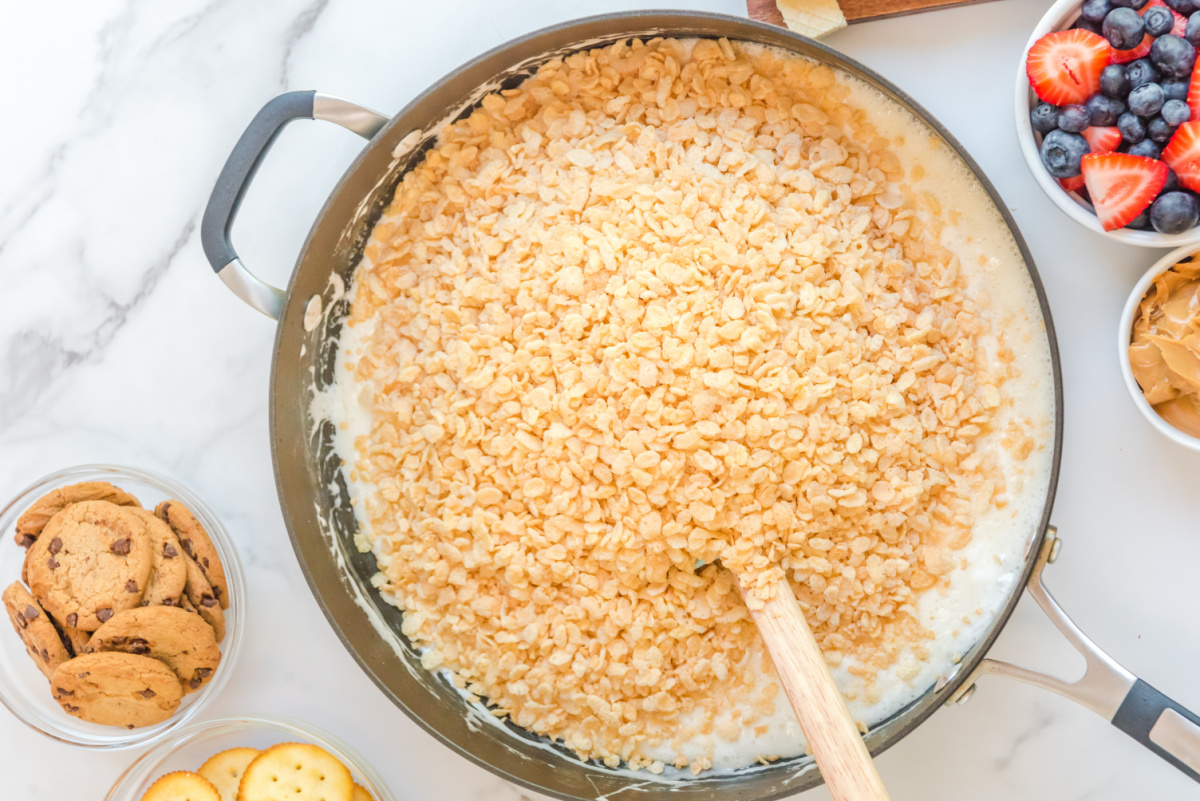
- Add rice crispy cereal and mix until fully coated.
- Immediately add this mixture to the bottom of a 9×13 baking dish.
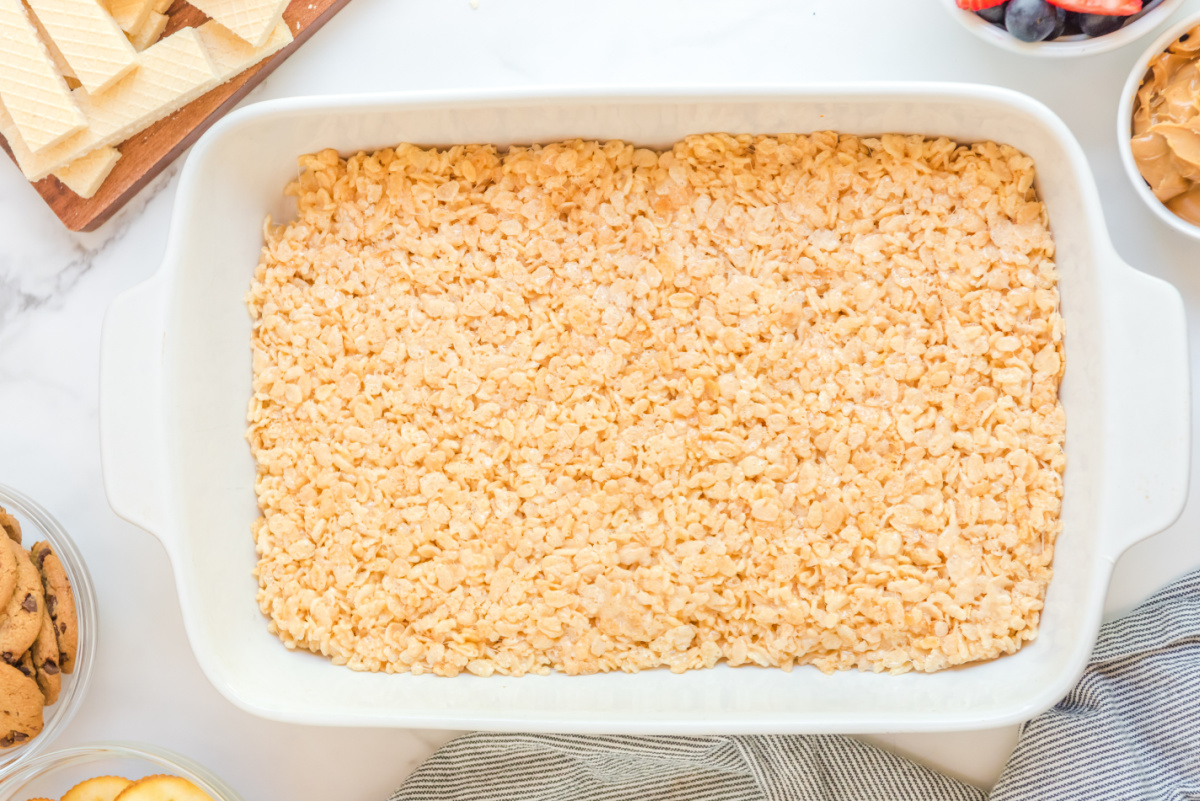
- Using a sheet of parchment paper, press down on the rice crispy flatly with the palm of your hand. Press into the corners and sides of the dish until the rice crispy treat is as flat and flush with the pan as possible. Cover and set aside to cool to room temperature for about 30 minutes.
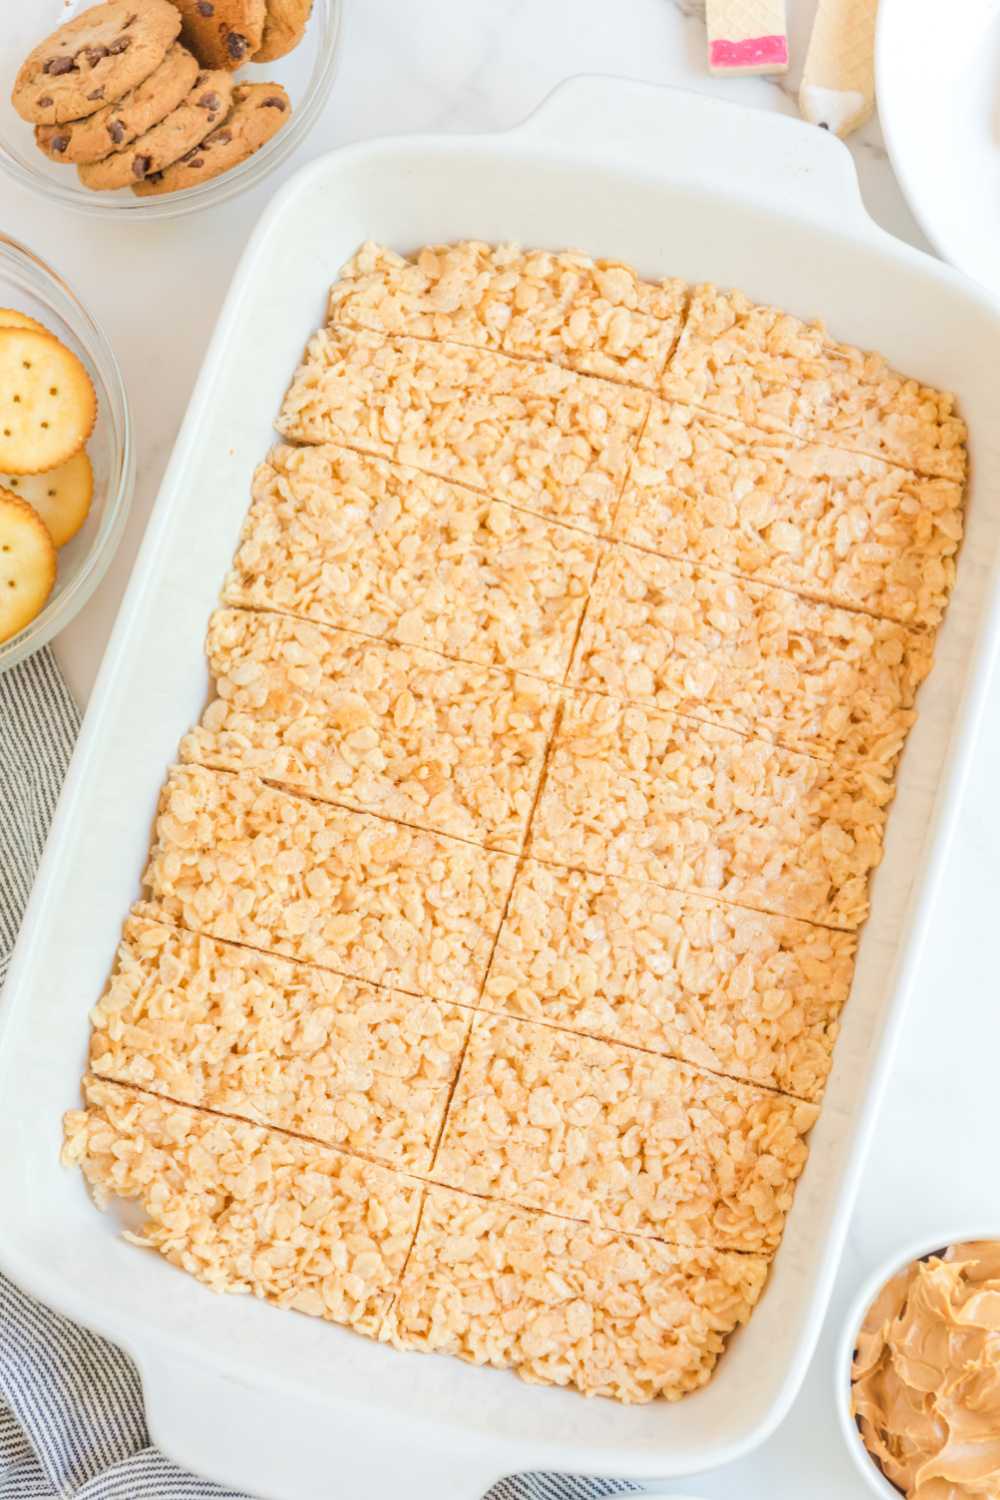
- When done, carefully cut the rice crispy treats into rectangles using a knife. Make one cut down the center from handle to handle and 6 cuts along the side to make (14) total rulers.

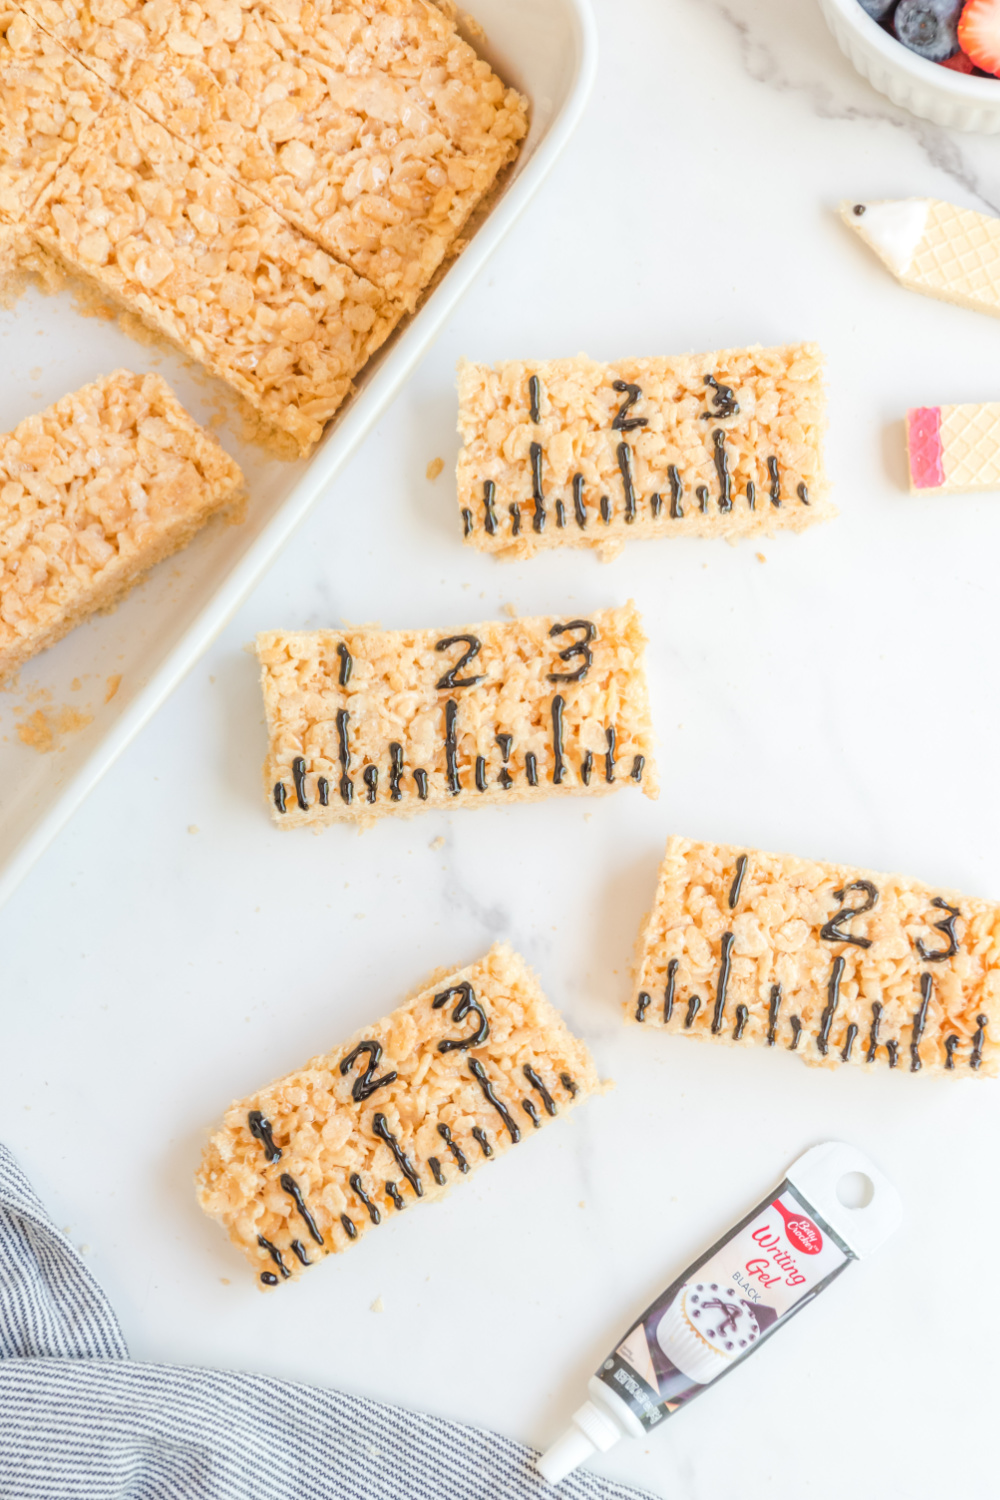
- Using the black writing gel, begin to make your ruler markings starting with the longest lines. Draw (3) lines along the long side of the rice cripy treat to the center of the rectangle. Next, in between the edges and longest lines, draw (4) lines about half the size of the line you drew previously, parallel.
- Fill in the remaining line spots with smaller lines, about half the size of the line you drew previously. Above the longest ruler lines, write out any number sequence of your choosing.
Chips Ahoy Smiley Faces Instructions:
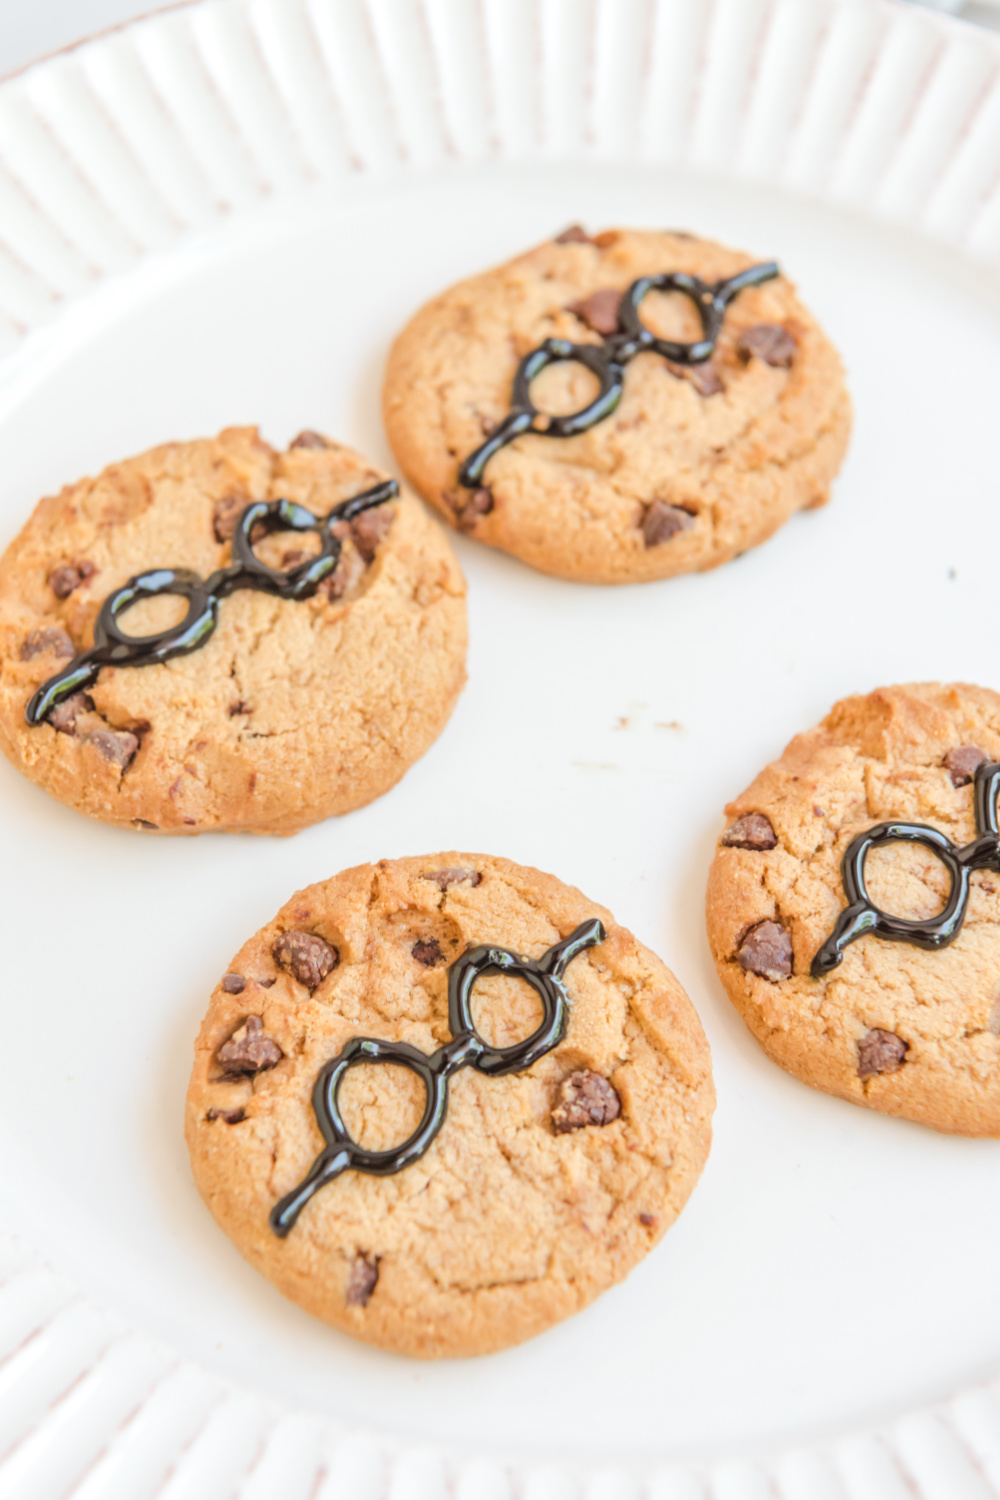
- Using black writing gel, draw two circles for glasses on the face of each cookie.
- Next, draw two black lines coming outward of each circle to represent the glasses frame. Be sure to draw a black line in between the two circles as well.
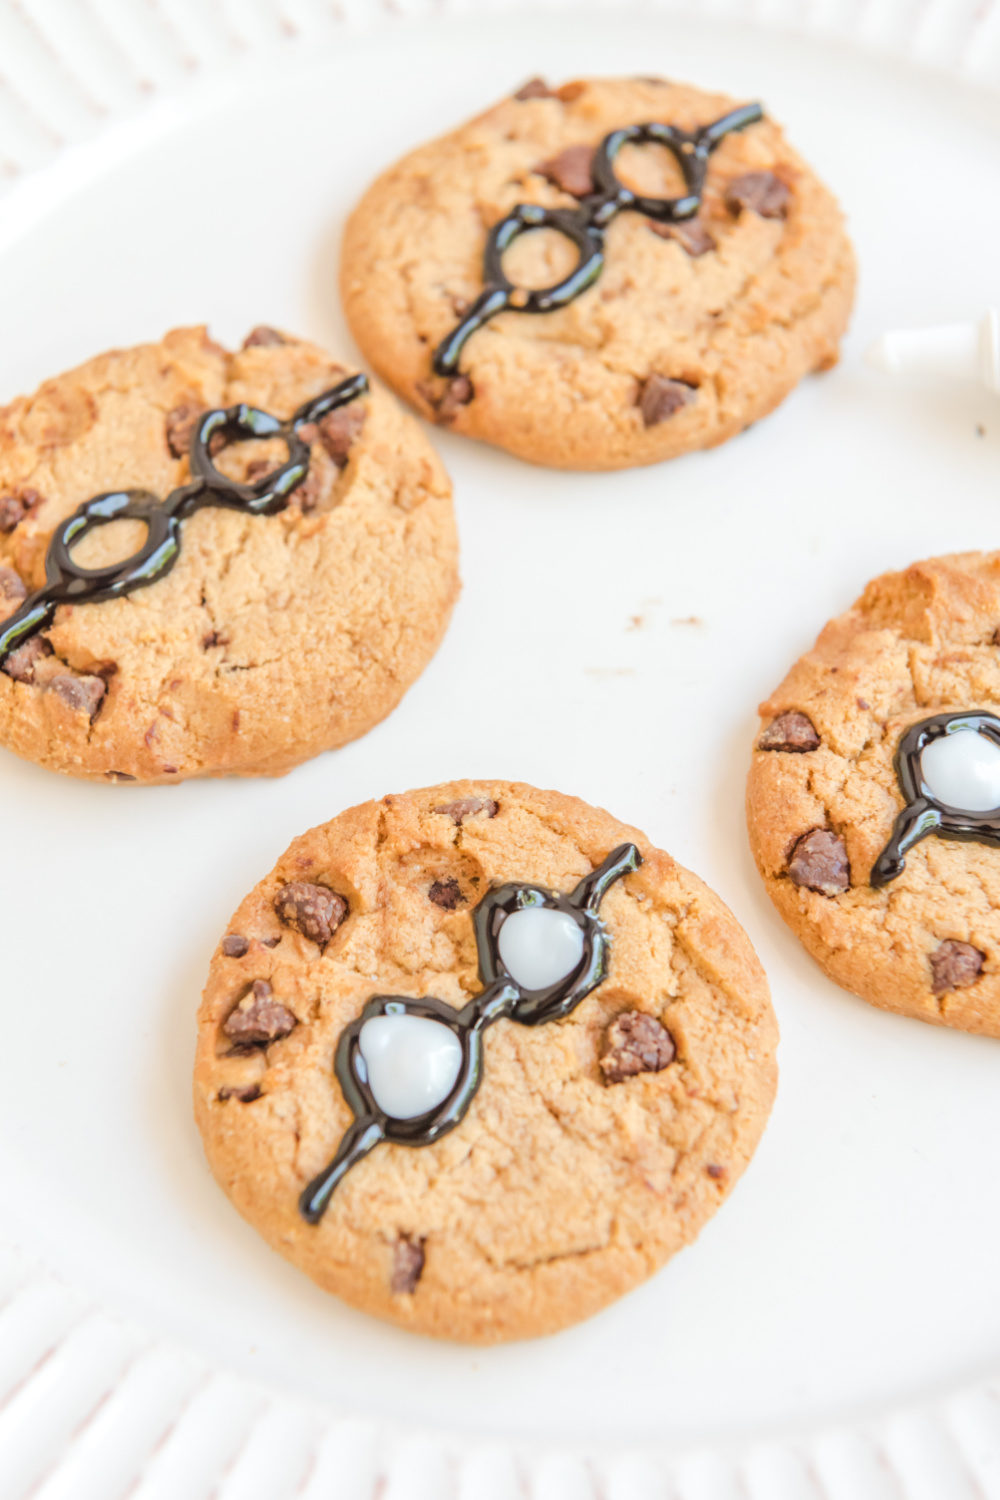
- Fill in the black circles with white writing gel. Start with a small dollop and use the tip of the writing gel pen to push the gel outwards, connecting with the black frame.
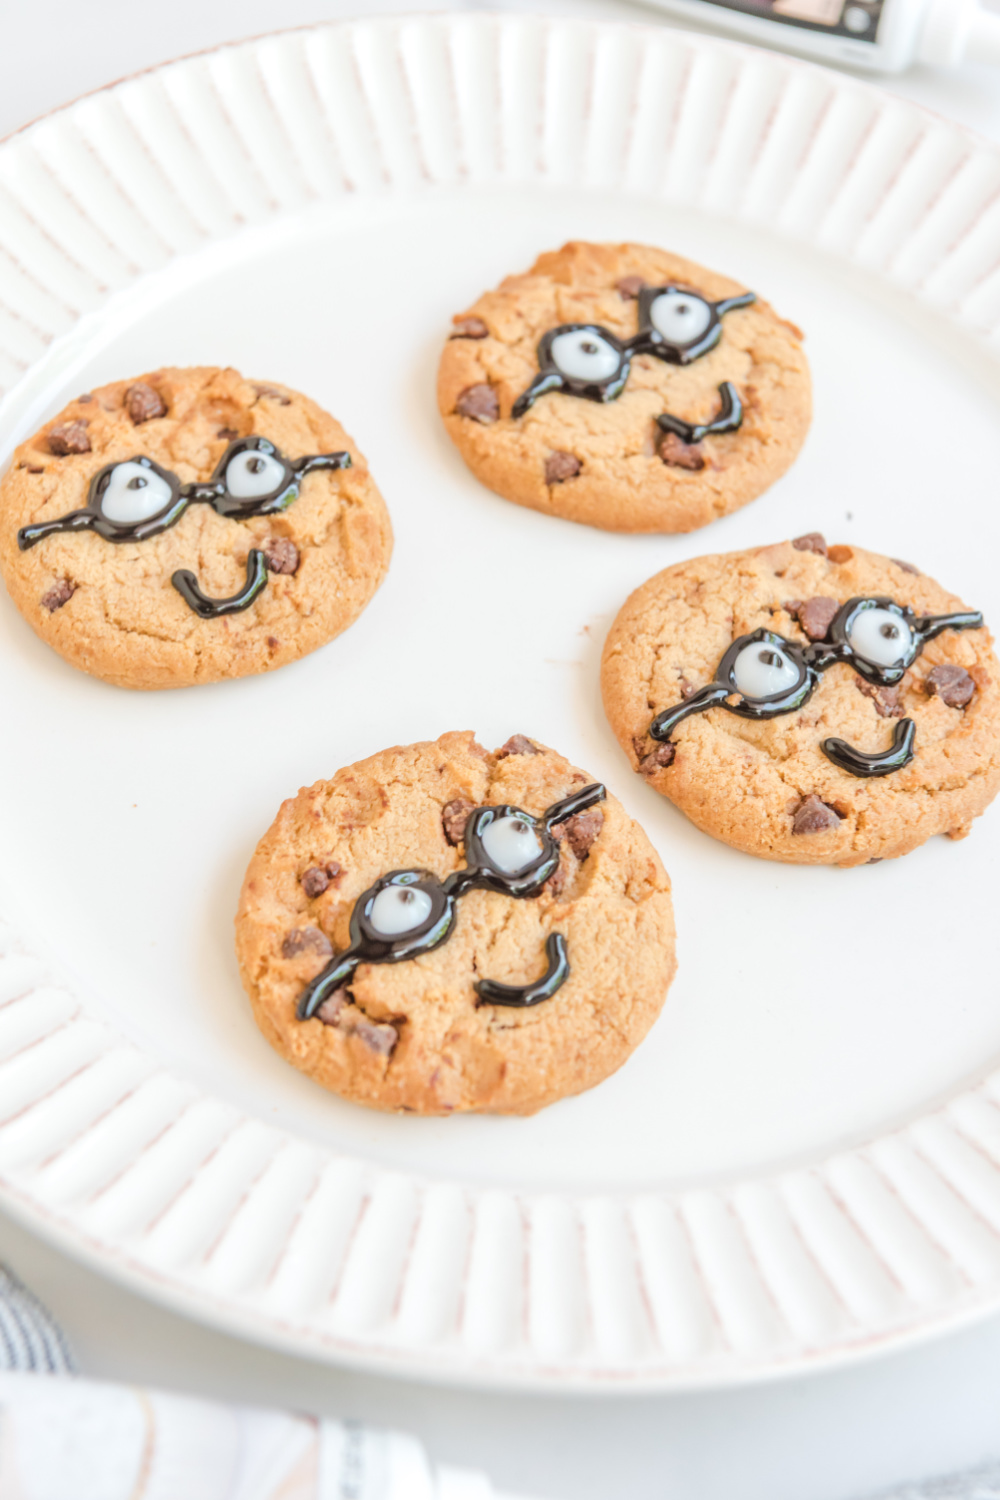
- Using the black writing gel again, carefully put two dots in the middle of each white space to represent the eyes. Be sure to not use a lot of gel. Draw an upwards smiley face under the glasses with the black writing gel.
- Top the smiley face cookies off with pink writing gel for the cheeks.
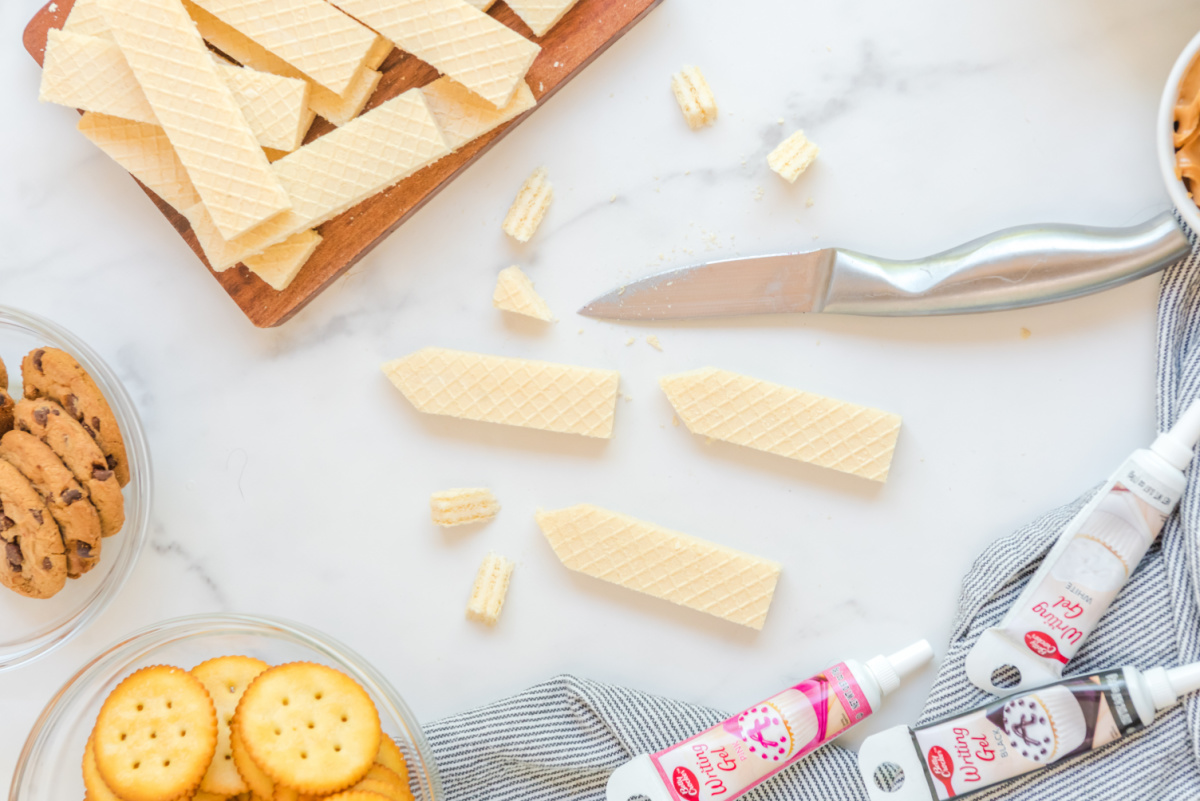
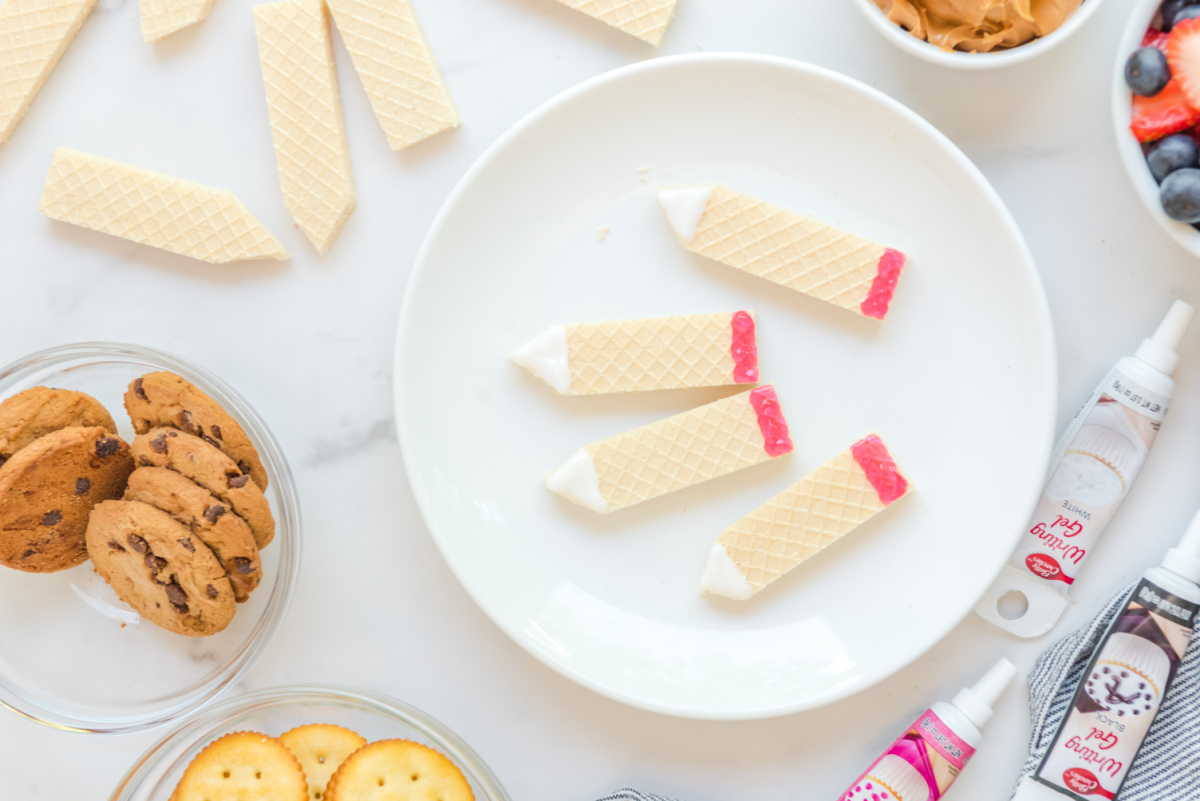
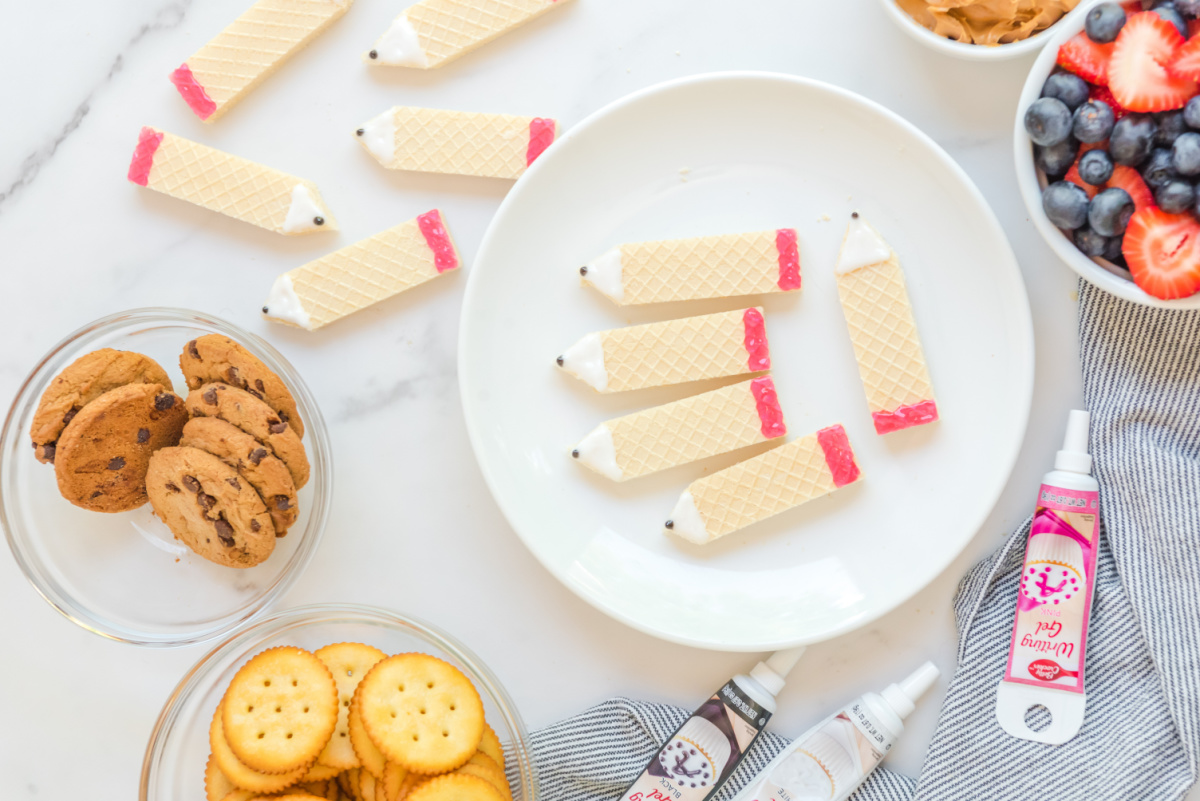
Vanilla Wafer Pencils Instructions:
- Using a knife, carefully cut the corners off of one end of each vanilla wafer. This will make your pencil shape and reflect the writing tip.
- Using the white writing gel, color in the triangle that is formed where you cut the corners from. Start by drawing a straight line across and then connecting at the tip. Fill in the triangle with the writing gel, pushing and connecting it together.
- Next, draw a rectangle at the very bottom of each wafer to represent the pencil using the pink writing gel.
- Take the black writing gel and form a small dot at the tip of the white triangle that you drew. This represents the lead. Repeat this process for all vanilla wafer pencils.
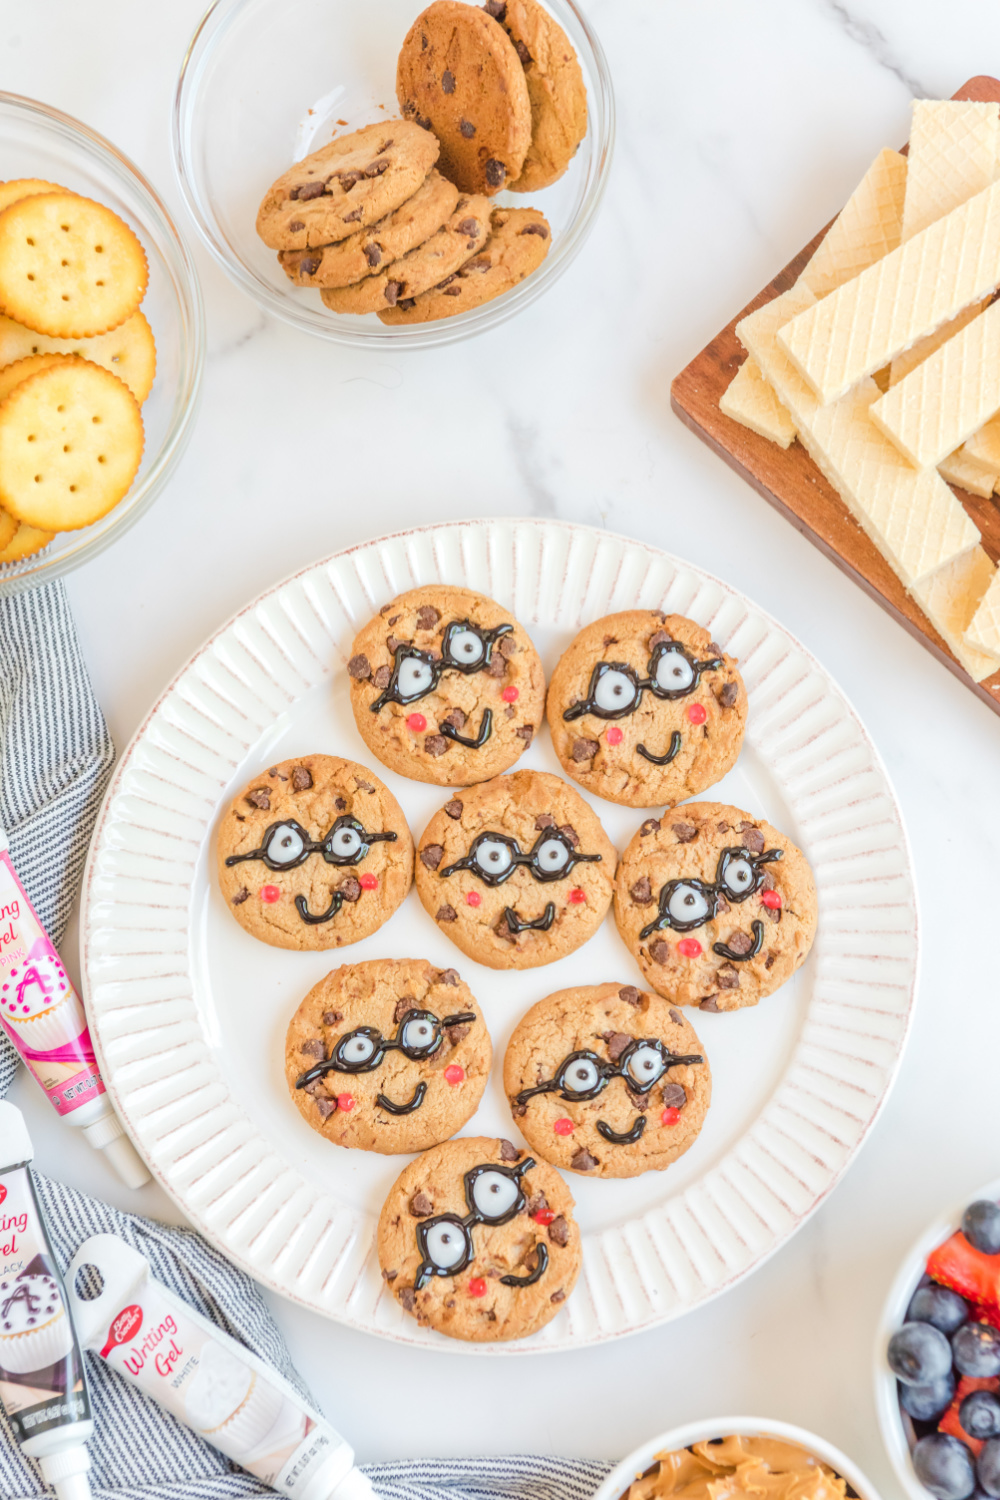
Board Assembly Instructions:
- Start your board by placing down the rice crispy treats and peanut butter up (or other dip/sauce of your choosing).
- Add smiley face cookies around the rice crispy treats and around the peanut butter.
- Next fill in the board with the vanilla wafer pencils, placing them in two places, opposite sides of each other.
- Fill in the remaining board spots with the other fixings such as the cheese & crackers, apple slices, and mixed fruit.

Back To School Themed Snack Board
Email this recipe!
Get this recipe emailed straight to your inbox!
Ingredients
Rice Crispy Ruler:
- 3 tablespoons butter
- 10 oz bag of mini marshmallows
- 6 cups rice crispy cereal
- Black writing gel
Chips Ahoy Smiley Faces:
- 4-8 Chips Ahoy Cookies depending on how many you want on your board
- Black white & pink writing gel
Vanilla Wafer Pencils:
- 6-8 vanilla wafers depending on how many you want on your board
- Black white & pink writing gel
Additional Board Fixings:
- Mozzarella cheese slices see alphabet cutter link below
- Ritz crackers
- Apple slices
- Peanut butter dipping cup
- Mixed fruit
Instructions
Rice Crispy Ruler Instructions:
- Place butter over low-medium heat until fully melted. Add the bag of mini marshmallows to the melted butter and stir using a ruber spatula until the marshmallows completely dissolve.
- Add rice crispy cereal and mix until fully coated.
- Immediately add this mixture to the bottom of a 9×13 baking dish.
- Using a sheet of parchment paper, press down on the rice crispy flatly with the palm of your hand. Press into the corners and sides of the dish until the rice crispy treat is as flat and flush with the pan as possible. Cover and set aside to cool to room temperature for about 30 minutes.
- When done, carefully cut the rice crispy treats into rectangles using a knife. Make one cut down the center from handle to handle and 6 cuts along the side to make (14) total rulers.
- Using the black writing gel, begin to make your ruler markings starting with the longest lines. Draw (3) lines along the long side of the rice cripy treat to the center of the rectangle.
- Next, in between the edges and longest lines, draw (4) lines about half the size of the line you drew previously, parallel.
- Fill in the remaining line spots with smaller lines, about half the size of the line you drew previously. Above the longest ruler lines, write out any number sequence of your choosing.
Chips Ahoy Smiley Faces Instructions:
- Using black writing gel, draw two circles for glasses on the face of each cookie.
- Next, draw two black lines coming outward of each circle to represent the glasses frame. Be sure to draw a black line in between the two circles as well.
- Fill in the black circles with white writing gel. Start with a small dollop and use the tip of the writing gel pen to push the gel outwards, connecting with the black frame.
- Using the black writing gel again, carefully put two dots in the middle of each white space to represent the eyes. Be sure to not use a lot of gel.
- Draw an upwards smiley face under the glasses with the black writing gel.
- Top the smiley face cookies off with pink writing gel for the cheeks.
Vanilla Wafer Pencils Instructions:
- Using a knife, carefully cut the corners off of one end of each vanilla wafer. This will make your pencil shape and reflect the writing tip.
- Using the white writing gel, color in the triangle that is formed where you cut the corners from. Start by drawing a straight line across and then connecting at the tip. Fill in the triangle with the writing gel, pushing and connecting it together.
- Next, draw a rectangle at the very bottom of each wafer to represent the pencil using the pink writing gel.
- Take the black writing gel and form a small dot at the tip of the white triangle that you drew. This represents the lead. Repeat this process for all vanilla wafer pencils.
Board Assembly Instructions:
- Start your board by placing down the rice crispy treats and peanut butter up (or other dip/sauce of your choosing).
- Add smiley face cookies around the rice crispy treats and around the peanut butter.
- Next fill in the board with the vanilla wafer pencils, placing them in two places, opposite sides of each other.
- Fill in the remaining board spots with the other fixings such as the cheese & crackers, apple slices, and mixed fruit.
Nutritional Disclaimer: Family Fresh Meals is not a dietician or nutritionist, and any nutritional information shared is only an estimate. We recommend running the ingredients through an online nutritional calculator if you need to verify any information.
Did You Make This Recipe?
Make sure to share it with me below!
